April 11, 2010 - I was able to wrap up priming with Rust Encapsulator on Friday, thus enabling me to start painting the interior on Saturday. Had to take my son Woody car viewing first part of the day to see what kind of vehicle he'd be happy with. He's starting USF in the fall and will need a dependable car to commute to school and back every day. So I started rather late in the day, about 4:00PM, but with plenty of time to get a first coat on.
As fate would have it, I was about 90% complete when the spray gun quit working and thus had to quit for the day and give it a good cleaning. I restarted on Sunday and was able to finalize the first coat. At this point, I ran out of the blue metallic paint and I'm debating whether or not buy more to give it a second coat. If I do decide to buy more, I'll get enough to paint the hell hole/transaxle area too. The price of the paint will be the decision point for sure.
I'm really pleased as to how well the blue paint sprayed on. Here are some pictures of the finalized first coat:
Passenger view of seat and foot well:
Passenger view of foot well:
Passenger view of seat back area:
View of driver and passenger seat back area:
Driver view of seat back area:
Driver view of seat well:
Driver view of foot well:
Driver view of console center tunnel:
Driver view of seat back firewall area:
Driver view of rocker panel:
Passenger view of rocker panel:
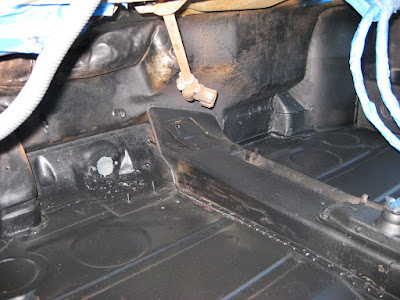
Passenger side gas tank area; you can clearly see the area above the driver foot well has been bashed in to accommodate the battery box that will hold three LA batteries:
Driver side gas tank area:
Sunday, April 11, 2010
Saturday, April 10, 2010
Priming with Rust Encapsulator
April 9, 2010 - Finally the weather has warmed up and the live oaks have just about quit spewing their pollen granules. I was able to tape up the car last weekend and attempted to start priming the car with Eastwood's Rust Encapsulator. The Rust Encapsulator is a great product and puts down a great coat but I don't think the creators intended for it to be used in a spray gun even though they do sell spray cans.
My first attempt at using thinned down Rust encapsulator ended in frustration as it just kept stopping up the gun. I used lacquer thinner like they suggested but it would just not spray. I eventually had to buy paint strainers and strain it extremely well before the gun would spray it. But once well-strained, it sprayed on like a champ. I have no doubt that the paint will lay down and adhere nicely to the coat of Rust Encapsulator. I intended to spray on two coats but I went thru 1 & 1/2 quart cans mixing up and straining enough for one good coat.
I should add that last Sunday after getting frustrated with the spray gun stopping up, I went to manual mode and used a 1" brush to paint the outer firewall in the hell hole. So when I figured out the straining trick, the hell hole got a second sprayed-on coat.
I'll paint the interior with the same blue paint as the exterior. I only have about 1/5 of the original gallon left. If I run out before I'm finished, I'll have to buy more. I'm pretty sure this paint is not cheap. For the hell hole/transaxle area, I'm going to use Eastwood's Rubberized Undercoating in spray cans. I used the undercoating after repairing the rust in the the passenger side front wheel well and it turned out extremely well.
Here's the car after taping it up:
Hell hole view from rear looking up forward after being primed:
Hell hole view, firewall closeup:
Hell hole view, left side:
Hell hole view, right side:
Transaxle compartment view, looking up from ground:
Interior view, driver side; passenger side not primed yet:
Interior view, driver side footwell:
Interior view, seat back firewall; passenger side not primed yet:
Interior view, driver seat well:
Interior view, driver side seatback; passenger side not primed yet:
Interior view, driver side seat well:
Interior view, driver side foot well:
Interior view, driver side footwell closeup:
Interior view, passenger side primed:
Interior view, passenger side seat back view:
Interior view, passenger side foot well:
Interior view, fully primed:
Interior view, both foot wells primed:
Subscribe to:
Posts (Atom)