Closer inspection revealed that there is very little difference between the potbox that Mark Hazen of EVHelp made for my controller and this Curtis PB-6. In fact, the only two differences were the potentiometer that was in the Curtis was a 0-5KOhm while the one in Mark's potbox was 0-2KOhm wired the opposite 2KOhm-0 and the diode to prevent the microswitch contacts from arcing from the opening of the contactor coil. So I replaced the potentiometer on the Curtis with a reverse wired 0-2KOhm and voila, it works just like the one Mark fabricated.
Here's a close up of the Curtis potbox mounted on an aluminum mount I fabricated with the help of two of my neighbors, Gene and Tony.

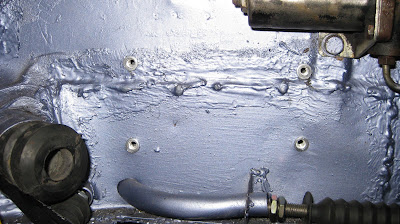
To mount the fabricated aluminum mount onto the firewall, I drilled four 3/8" holes and installed four 1/4" Rivnuts. Here's a shot of the installation site with the rivnuts freshly installed:
I then used 1/4" bolts to fasten the potbox mounts to the Rivnuts. I have to say, I am much happier with this arrangement than I was with the EVHelp's potbox mounted in the aluminum box.

Here's a great shot of the entire lower firewall showing the potbox on the left, emergency breaker in the center, and controller on the right. You can definitely see that the controller bottom is flush with the bottom of the firewall, thus the need to add a ramair scoop.

Next, I moved on to increase the offset between the firewall and the controller that will allow air to flow over and hopefully cool the heatsink fins. I will add a ramair scoop to the bottom of the controller that will extended below the firewall and redirect oncoming air into the new formed cooling cavity. I increased the offset from 1" to 2-1/2" which created a cooling channel of 1-1/2". Here's a shot from the left side of the controller:

Here's a shot from the bottom of the car looking up:

And finally a shot from the top of the controller looking down:

What's left is to wire up a few more things, probably a dozen wires or so and cable up the emergency breaker before I mount the motor and transaxle.

No comments:
Post a Comment