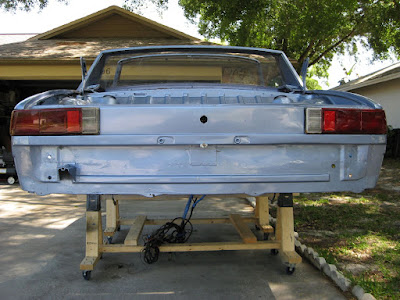
Friday, June 18, 2010

Front Suspension Installed

June 18, 2010 - After most of last weekend 6/12-6/13 and this evening, I was able to wrap up re-installing the front suspension. Whew! What a job that was.

About a year ago, I spent about 2 weekends wirebrushing and sanding the control arms, auxillary support carrier, and shock aborber struts. I sprayed them with Eastwood's Rust Encapsulator and then spray painted them with black enamel paint.

Of course, the really hard part was getting the old rubber bushings off of the control arms. With the aid of my neighbor Gene aka the Gas Doctor, we heated the control arms with a propane torch just enough to get the rubber soft and was then able to pry the control arm bushing sleeves off of the control arms.

I ordered new polygraphite front control arm bushings from Pelican Parts (a set of 4 for $20) and then proceeded to install them. That was no easy task in itself but my neighbor Tony helped me to brute force them on and into position. Did I say that it's really good to have helping neighbors? I couldn't do all of these things without my neighbors' help. Here's the bushings:


And here's how they fit on:


I purchased a brand new pair of Bilstein front struts from PartsGeek for about $230 over a year ago. I also purchased a set of turbo tie rods from PartsGeek for about $150 a little later. I really don't have a lot of money but if you purchase these items on a monthly basis over a year's period or more, it really is a lot less of a strain on your budget. Oh yeah, I almost forgot the 23mm SwayAway torsion bars from Don's Sport Vehicle for about $230 but it took them 3-4 months to get them to me.

Here's the left turbo tie rod installed:


And the right turbo tie rod:


The ball joints were about $70/piece for a total of $140 from PartsGeek; again, another monthly expense from over a year ago. I had to lower the control arm/carrier assembly after bolting it in place in order to install the ball joints. Once I got the ball joints in place at the bottom of the struts, I also had to lower the struts and slowly raised the control arm/carrier assembly to fit the ball joints into the control arm and then tighten the grooved nuts over the bottom of the ball joints afixing them and the struts to the control arms. Here's the left ball joint:


And right ball joint:


After I got the ball joints installed, I had to slowly raise the control arm/carrier/strut assembly until the top strut bolts fit thru the front shock tower holes. I added the tab washers and locking nuts to the top of the struts and tightened them down.

Both turbo tie rod and ball joint attached to the right strut:


And the left strut:


Here's the right control arm front bushing and torsion bar:


And the left control arm front bushing and torsion bar:


I just need to glue the torsion bar caps back into place and bolt the bushing sleeves to the bottom of the frame.

Thursday, June 17, 2010

Evision and LiFePO4 in my future

June 17, 2010 - I've finally made the mental decision to go with LiFePO4 (lithium iron phosphate) batteries instead of lead acid. The decision was a long and difficult one but after carefully weighing the facts, it was obvious that lithium was the intelligent way to go.

The cost of 20 US Battery US-2200 232AH batteries is approx $2600, would weigh 1240 lbs, provide 120V traction pack, may last 3-5 years, and would probably only get a range of perhaps 40-50 miles on a single charge with moderate driving.

The cost of 40 Thundersky TS-LFP200AHA batteries is approx $10000, would weigh 640 lbs, provide a 128V traction pack, may last 8-13 years, and would probably get a range of 80-100 miles on a single charge with moderate driving. Thundersky specs >= 3000 charge cycles for 80% DOD and >= 5000 charge cycles for 70% DOD.

What's amazing about the lithium batteries is that they have an energy density of almost 5 times that of lead acid batteries. That means that a lithium battery stores 5 times the power per kilogram of weight than lead acid and 2 times as much as NiMH.

There are two different form factor 200AH batteries from Thundersky. 4 cells will constitute a 12.8 battery pack with 10 batteries supplying 128V. The Type A packs will fit into the polypropylene battery boxes quite nicely. 5 packs will fit into the front box and 5 will also fit into the engine box both boxes will have room to spare. The Type B packs are a good bit larger than the Type A but will fit into the racks for the front and engine compartments.

Thundersky TS-LFP200AHA Type A is 11in H x 7-1/4in W x 2-3/4in L


Thundersky TS-LFP200AHA Type B is much larger at 10" H x 14-1/4" W x 2-1/4" L


Considering the overall cost of the restoration and conversion, even though the lithium batteries are 4 times the cost of lead acid batteries, the lithium batteries will provide the conversion with a quality traction pack that will make it comparable in range to that of the new Nissan Leaf. The lithium pack will also allow me the opportunity to drive a round-trip work commute without having to charge at work. The addtional power will allow me to install an air-conditioning system that is much needed here in FL.

To ensure that extra precaution is taken to protect my significant investment in lithium technology, I have decided to purchase an EVision system from Metric Mind. The main purpose of the EVision is to monitor the State of Charge and ensure that I don't exceed an 80% DOD.

Here's the EVision displayed in both color schemes. I like the blue and white display.


The EVision should barely fit into the Porsche's fuel gauge housing. The housing is about 95mm in diameter whereas the Evision is about 73mm in diameter and PC board is 86mm wide. Here's the fuel gauge:


And the EVision In-dash display:


I'm still trying to find out what the cost of the EVision is. The Metric Mind website currently says price is TBD but I seem to remember looking at the site about a year ago and thought it said $600-700 plus you need $100 worth of shunts, so, I'm going to budget about $1000.

Finally got a response from Victor Tikhonov of Metric Mind but he replied saying that pricing was still not available but that it shouldn't be more than $900. So my budget estimate was right on the mark.

Sunday, June 6, 2010

Rear Suspension Installed

June 6, 2010 - Didn't get a enough accomplished over Memorial Day weekend that warranted a new post but this past weekend, I definitely did. After pouring over numerous threads on 914world.com about working with the polygraphite bushings that go into the trailing arms, I finally decided to operate on mine. I had previously ordered the bushings from PelicanParts.com for $70; a set of 4, 2 on each trailing arm. One positive thing I can say about Pelican Parts, is that they ship really fast.


The polygraphite bushings are notorious for squeeking so I made sure that I did what most of the threads advised. I took a wrasp and filed off enough inside of each bushing so that the large pin that fits in them does not bind very much. I initially had to press one in and then read that this was way too tight. Once I was able to push the pin into place, I was able to determine that I needed to file off about 1/8" off each bushing end so that the pin protrudes enough to make contact with the susepnsion ear and the control arm bearing; metal on metal, not bushing on metal. I then cut 4 small grease channels into each bushing with a hack saw blade and painted the inside and channels with Permatex anit-seize lubricant.

Here's how the bushings fit into the traing arm and the pin fits into the bushings:


Oh yeah, I forgot to mention that earlier in the week I had new $50 bearings per trailing arm pressed in at my favorite Tire Kingdom store. I also had the guy take out and press in new races into the front brake rotors. All total, the guy charged me $25 for labor; all things considered, money well spent.

Finally after prepping the bushings and inserting the pins, I was ready to install the trailing arms. After multiple trial installations, I was able to mount the trailing arms into the suspension ears and control arm bearings. The control arm bearing is also where the shims are added if you need to add camber. I also installed the strut assemblies too which had been previously assembled with new 180 lb springs from Pelican Parts $136/pair and new Boge heavy duty shock absorbers $98/shock previously purchased some time ago.

And here they are, left trailing arm and strut assembly:


And right trailing arm and strut assembly:


I'm going to tackle the front suspension next weekend.

Sunday, May 23, 2010

Instrument Panel, Side Markers, and Turn Signals

May 23, 2010 - Lots of small things installed. Mainly but not so small is the instrument panel assembly. Whew!! What a PITA that was. All three gauges, Tachometer, Speedometer, and Fuel Gauge had to taken apart, glass cleaned, and retaining rings rust remediated (rust killer, rust encapsulator, and painted flat black). Also treated the instrument panel as well.

Headlights almost finished along with turn signals:


Installed the side markers and turn signals with new seals from Mark Whitesell in Hillsboro, OR. His eBay merchant name is 914rubber.


Left turn signal:


Right side marker:


Right turn signal:


Gauges looking pretty good, added dashboard to see how it would look. My neighbor Freddie helped to hook up all of the gauge connectors and indicator bulbs. Another PITA. I replaced the illuminating incandescent bulbs with blue LEDs from Mike Whitesell aka eBay merchant autoleds4you. He sells 8 for $20. There are 5 illumninating bulbs and 8 indicator bulbs for a total of 13.


Another view of the instrument panel and dashboard:


Check out the new rear trunk seals. The previous owner sold me these along with his other eBay auction items he had procured along the way:


I was able to win a windshield via eBay for $120 but the shipping was $200. It was packaged and shipped by UPS in Auburn, WA. They did a really nice job of packaging to ensure it was received intact, which it was. A lot better than the AutoAtlanta price of $500 plus $200 shipping. I'll try to have it installed when I have all of the seals and installation kit. More on that later.

Sunday, May 2, 2010

Painting Finished - Headlights Installed

May 2, 2010 - I have finally finished painting the vehicle. Woohoo! I had to buy more paint from Sherwin Williams Automotive and was able to put another coat on the interior and two coats on the hellhole/transaxle area. She really looks great now, inside and underneath.

Here's the hellhole firewall; looking very clean:


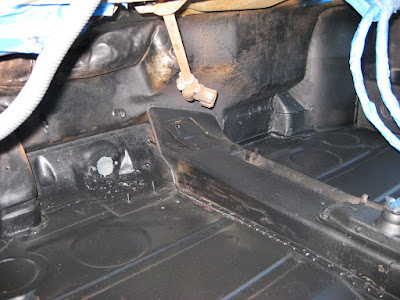
Here's the ceiling of the transaxle area:


Here's a left view of the hellhole area:


And a right view of the hellhole area:


I went thru two bad headlight motors and two relays, luckily I had six, and it took 4 hours in total to get the right headlight and motor installed correctly but it definitely works. I had to buy another headlight assembly off eBay to get the actuator lever and couple other related parts to install the left headlight assembly but finally got it intalled. The assemblies are black from coating with Eastwood's Rust Encapsulator. They were terribly rusty but with a lot of painstaking labor, I was able to restore them. You can also see the almost new chrome headlight rings that I got off eBay for $10 with shipping.


I also ordered new taillight housing seals from eBay vendor 914rubber and installed both assemblies.

Sunday, April 11, 2010

Painting the Interior

April 11, 2010 - I was able to wrap up priming with Rust Encapsulator on Friday, thus enabling me to start painting the interior on Saturday. Had to take my son Woody car viewing first part of the day to see what kind of vehicle he'd be happy with. He's starting USF in the fall and will need a dependable car to commute to school and back every day. So I started rather late in the day, about 4:00PM, but with plenty of time to get a first coat on.

As fate would have it, I was about 90% complete when the spray gun quit working and thus had to quit for the day and give it a good cleaning. I restarted on Sunday and was able to finalize the first coat. At this point, I ran out of the blue metallic paint and I'm debating whether or not buy more to give it a second coat. If I do decide to buy more, I'll get enough to paint the hell hole/transaxle area too. The price of the paint will be the decision point for sure.

I'm really pleased as to how well the blue paint sprayed on. Here are some pictures of the finalized first coat:

Passenger view of seat and foot well:


Passenger view of foot well:


Passenger view of seat back area:


View of driver and passenger seat back area:


Driver view of seat back area:


Driver view of seat well:


Driver view of foot well:


Driver view of console center tunnel:


Driver view of seat back firewall area:


Driver view of rocker panel:


Passenger view of rocker panel:


Passenger side gas tank area; you can clearly see the area above the driver foot well has been bashed in to accommodate the battery box that will hold three LA batteries:


Driver side gas tank area:

Saturday, April 10, 2010

Priming with Rust Encapsulator

April 9, 2010 - Finally the weather has warmed up and the live oaks have just about quit spewing their pollen granules. I was able to tape up the car last weekend and attempted to start priming the car with Eastwood's Rust Encapsulator. The Rust Encapsulator is a great product and puts down a great coat but I don't think the creators intended for it to be used in a spray gun even though they do sell spray cans.

My first attempt at using thinned down Rust encapsulator ended in frustration as it just kept stopping up the gun. I used lacquer thinner like they suggested but it would just not spray. I eventually had to buy paint strainers and strain it extremely well before the gun would spray it. But once well-strained, it sprayed on like a champ. I have no doubt that the paint will lay down and adhere nicely to the coat of Rust Encapsulator. I intended to spray on two coats but I went thru 1 & 1/2 quart cans mixing up and straining enough for one good coat.

I should add that last Sunday after getting frustrated with the spray gun stopping up, I went to manual mode and used a 1" brush to paint the outer firewall in the hell hole. So when I figured out the straining trick, the hell hole got a second sprayed-on coat.

I'll paint the interior with the same blue paint as the exterior. I only have about 1/5 of the original gallon left. If I run out before I'm finished, I'll have to buy more. I'm pretty sure this paint is not cheap. For the hell hole/transaxle area, I'm going to use Eastwood's Rubberized Undercoating in spray cans. I used the undercoating after repairing the rust in the the passenger side front wheel well and it turned out extremely well.

Here's the car after taping it up:


Hell hole view from rear looking up forward after being primed:


Hell hole view, firewall closeup:


Hell hole view, left side:


Hell hole view, right side:


Transaxle compartment view, looking up from ground:


Interior view, driver side; passenger side not primed yet:


Interior view, driver side footwell:


Interior view, seat back firewall; passenger side not primed yet:


Interior view, driver seat well:


Interior view, driver side seatback; passenger side not primed yet:


Interior view, driver side seat well:


Interior view, driver side foot well:


Interior view, driver side footwell closeup:


Interior view, passenger side primed:


Interior view, passenger side seat back view:


Interior view, passenger side foot well:


Interior view, fully primed:


Interior view, both foot wells primed: